NEW! Check out a quick how-to video here!
You can download a printable PDF copy of these instructions here.
INSTRUCTIONS
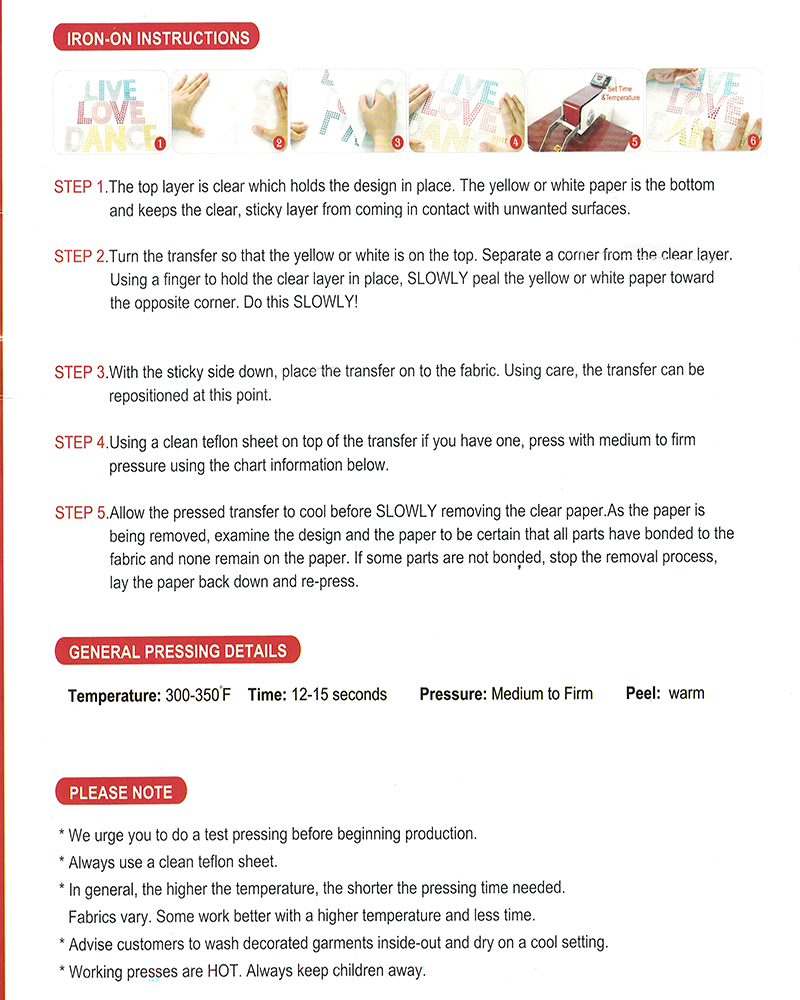
STEP 1. The top layer is clear which holds the design in place. The white paper is the bottom and keeps the clear sticky layer from coming in contact with unwanted surfaces.
STEP 2. Turn the transfer so that the white is on the top. Separate a corner from the clear layer. Using a finger to hold the clear layer in place, SLOWLY peel the white paper toward the opposite corner. Do this SLOWLY!
STEP 3. With the sticky side down, place the transfer on to the fabric. Using care, the transfer can be repositioned at this point.
STEP 4. Using the white layer between your transfer and the iron, or a clean teflon sheet on top of the transfer if you have one (a cotton sheet would also work), press with medium to firm pressure. For better adhesion, iron again from the other side.
STEP 5. Allow the pressed transfer to cool completely before SLOWLY removing the clear paper. As the paper is being slowly removed, examine the design and the clear layer to be certain that all parts have bonded to the fabric and none remain on the clear layer. If some parts are not bonded, stop the removal process, lay the clear paper back down and re-press.
GENERAL PRESSING DETAILS
Temperature: 300-350°F Time: 12-15 seconds Pressure: Medium to Firm Peel: warm/cool
PLEASE NOTE
- In general, the higher the temperature, the shorter the pressing time needed. Fabrics vary. Some work better with a higher temperature and less time.
- Wash decorated garments inside-out and dry on a cool setting.
- Working presses are hot. Always keep children away.